Winter RV living in a three-season travel trailer is challenging but I’ve got a few tips to make it more comfortable. I’ve been preparing for full-time RV living in winter for a few weeks and have come up with some surprising and creative ways to keep the cold air out and the warm air inside.
Three-season RVs are not built for winter RVing but there are some areas we can tackle to improve winter livability. Today we’ll talk about storage areas and under beds. Hopefully, no matter what type of RV you have you can apply some of these same solutions.
Outside Storage Bays and Under the Beds
I have twin beds in my Airstream and under each of them is a storage bay accessible from the outside. I’ve had the platform off the spare bed but never really considered just how much cold (or hot) air can enter through that space.
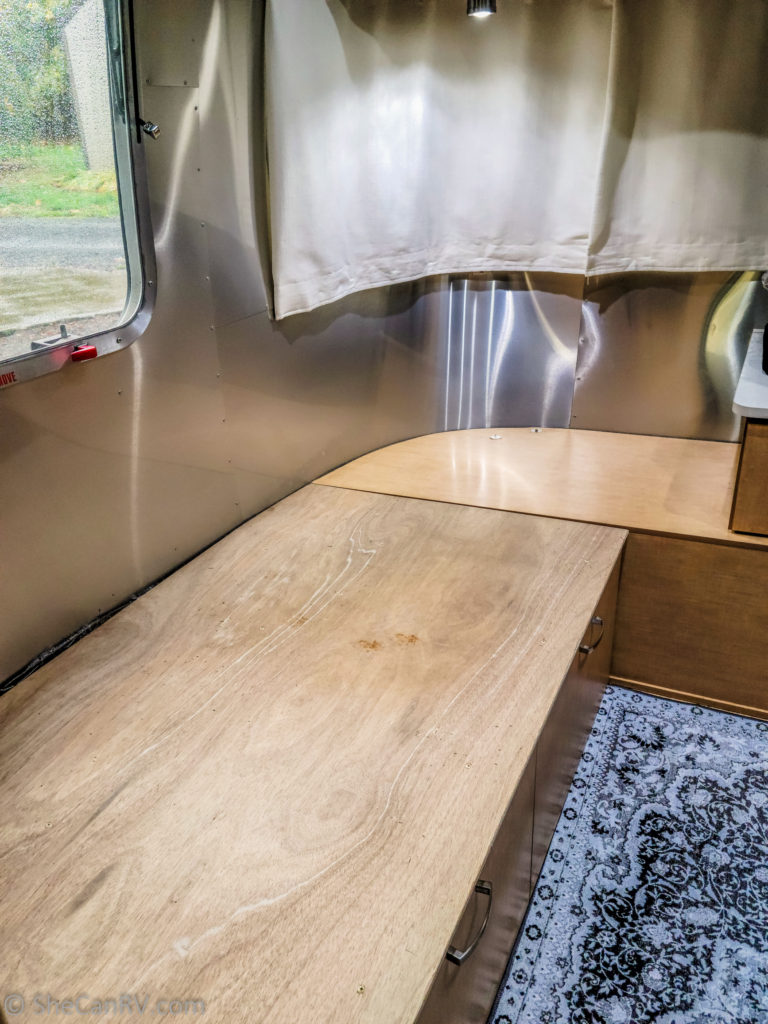
This is my bed with the mattress removed. There is a 1/4″ sheet of plywood between the mattress and the cold air on the other side of the plywood. This called for some serious insulating.
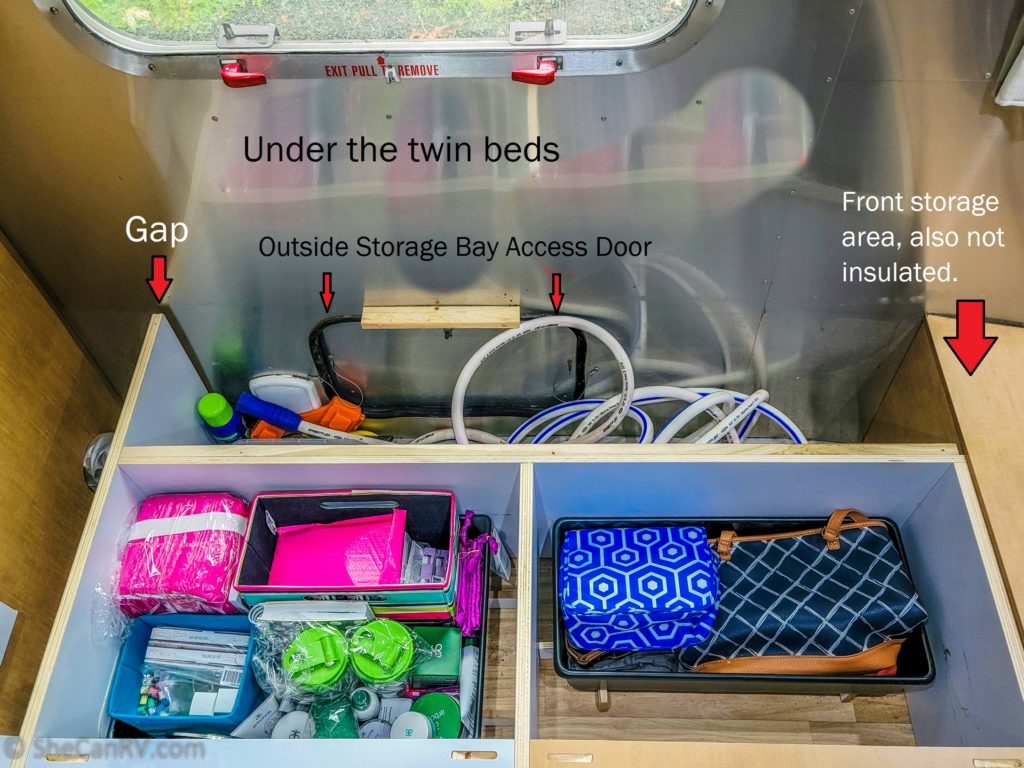
Under the bed platform is interior and exterior storage. There was no insulation and there are some large gaps between the exterior wall and the frame of the storage area. There isn’t much I can do about the air coming in through the exterior door but I insulated three walls in the exterior bay with Reflectix and filled the gaps with weather stripping.
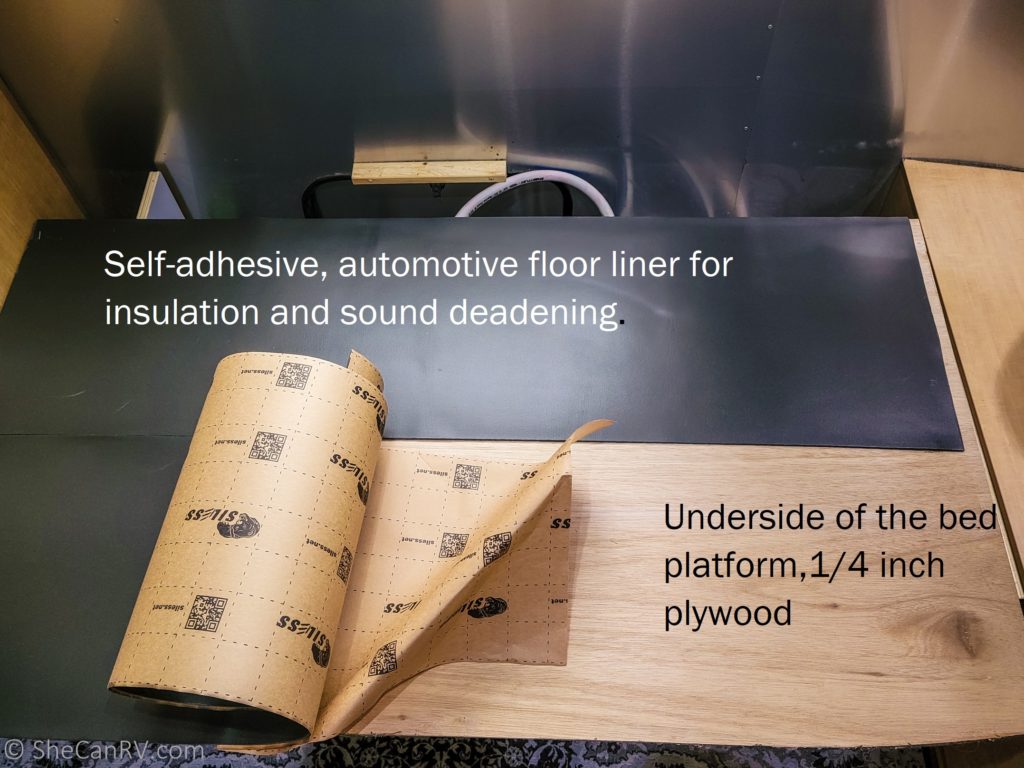
Next, I flipped over the plywood bed platform to expose the underside. I applied self-adhesive insulation/sound deadening material meant for cars. I wanted something thin enough not to interfere with the fit of the platform but effective. It was inexpensive, easy to apply, and one roll was enough to do both beds with some leftover. Car Sound Deadening & Heat Insulation Closed Cell Foam.
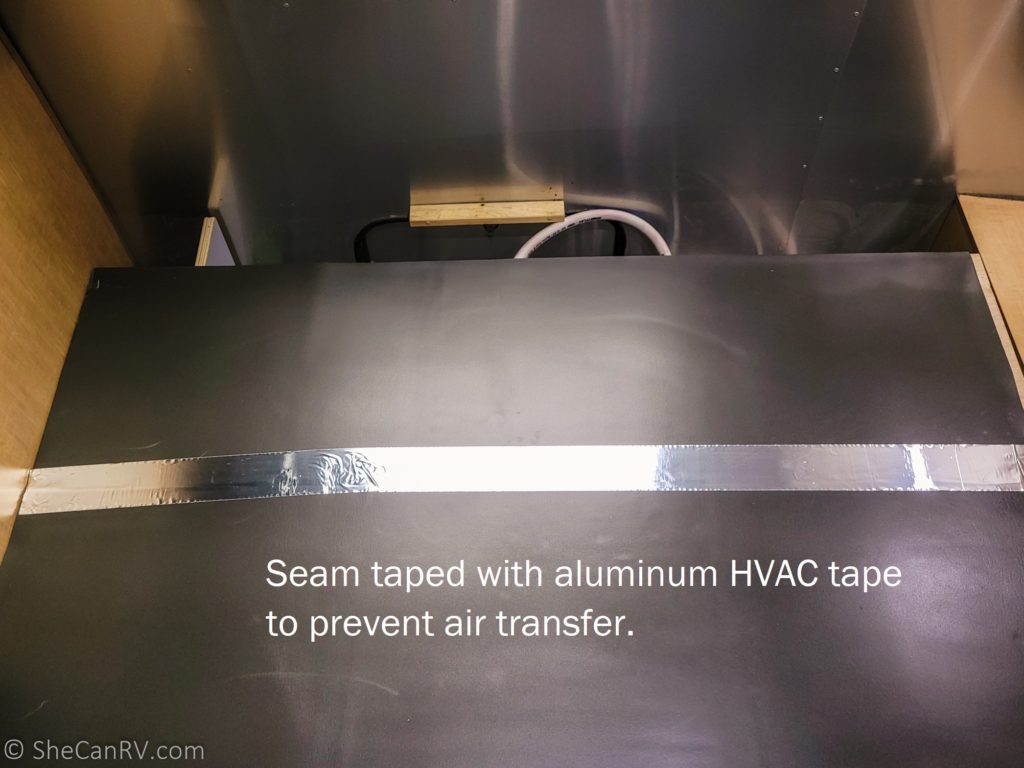
After I applied the insulation, I taped the seam with aluminum HVAC tape. This is the same tape I used to apply the skirting to my Airstream last week. Cold Weather Aluminum Foil Tape, 3″ x 50 yd. We just had a huge storm come through the Pacific Northwest with strong winds and power outages and my skirting didn’t budge. I love this tape.
I forced weatherstripping into the large gaps in the exterior storage bay. I used Sponge Neoprene Stripping With Adhesive 1 in Wide X 1/2 in Thick X 25′ Long.
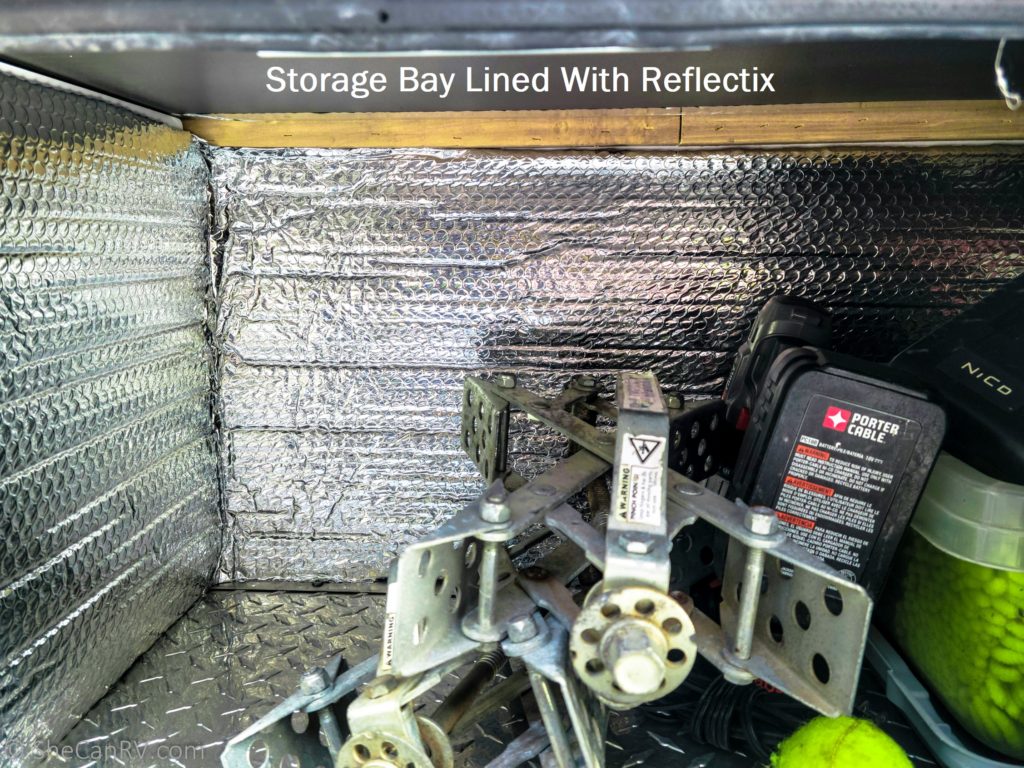
I wrapped the walls in the exterior storage bay with Reflectix to insulate further. I also taped it in place using the aluminum tape I mentioned above. I used Double Bubble Reflective Foil Insulation.
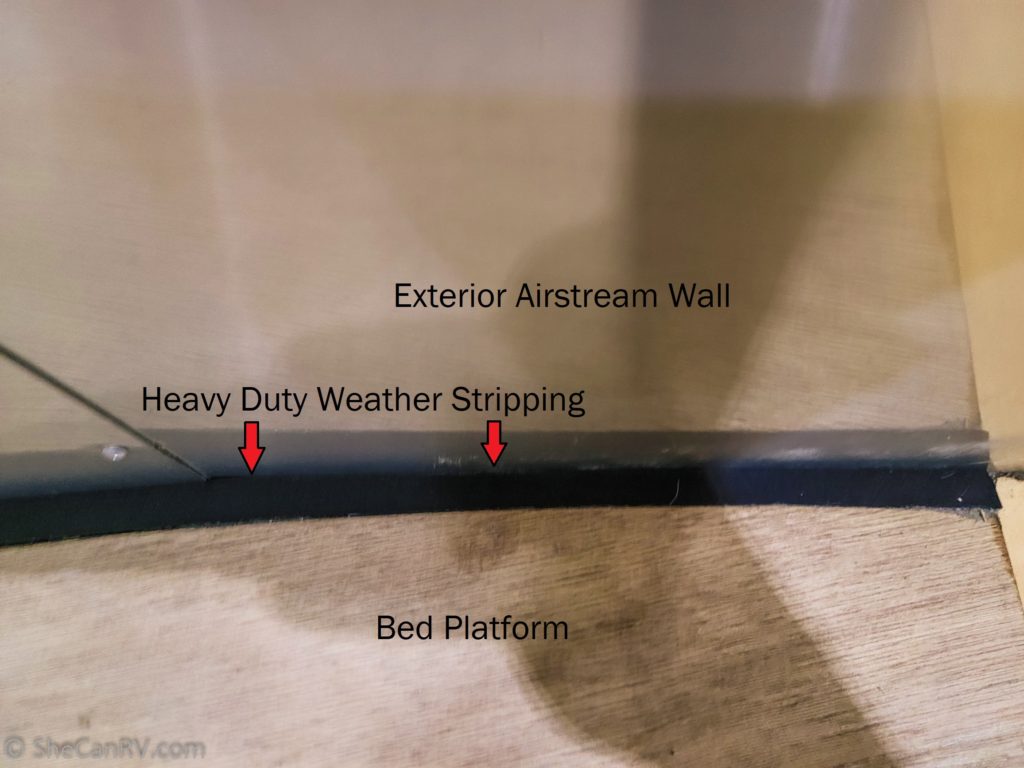
Finally, I applied the same weatherstripping to the edge of the bed platform that butts up against the exterior wall to close the gaps. The gap on the other side was so large in one area, I had to use a double layer of weatherstripping to block the airflow.
Then I screwed the bed platform back in place.
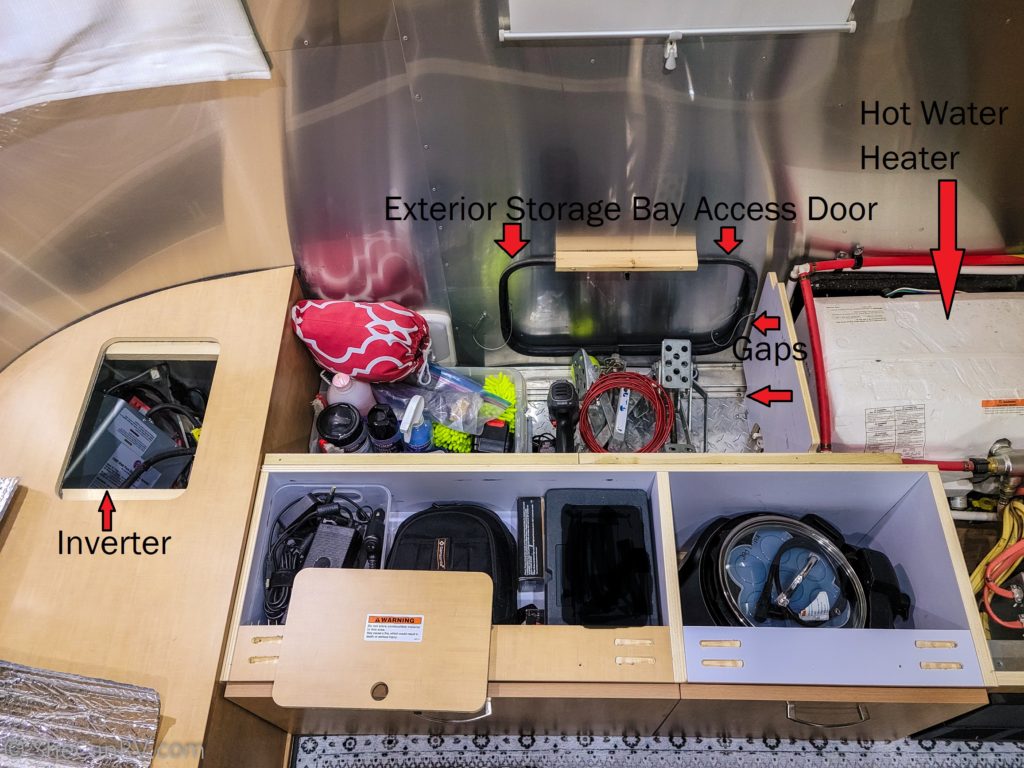
The other bed was somewhat different because it has my hot water heater, charge controller, breaker box, and inverter installed under it. On the left, you can see where my inverter is installed. These put out heat so there is a vent in the front-end storage bay to keep it cool. My inverter doesn’t work so I don’t need this vent. I’ll be sealing it up when I insulate the front-end storage bay.
Make sure you don’t cut off necessary airflow to equipment that needs to breathe. My hot water heater, breaker box, and charge controller are all vented properly even with the insulation I added.
I cut a piece of Reflectix to fit under the inverter cover and added a larger one under the mattress in that same area.
If you look closely, the panel that separates the hot water heater from the exterior storage bay has very large gaps around the edges. It appears to be there as a safety precaution to avoid damaging the hot water heater. I filled in all the gaps and lined the bay with Reflectix as I did on the other side.
Both areas under the beds are sealed up tight and I can definitely tell a difference. I can really feel the cold air coming in around the front-end storage area but once the rain lets up, I’ll get out there and take care of that.
More Winter RV Living Posts
This is a multi-part project and I’ll post more soon. If you haven’t seen my post about skirting my Airstream for less than $100, take a look.
RV Skirting for Winter – How To Skirt Your RV On The Cheap
Cozy Full-Time RV Living in Winter – 5 More Simple Tips
RV In Winter – 7 Easy Ways to Keep Cozy and Warm
If you like this post, please pin it.
You are investing your time so well. Summer and winter you well feel a temp difference in your Airstream.
I’m impressed
Glenda
I shared this one with the Airstream Group on Facebook because I thought it might be helpful to someone there.
Thanks Glenda!
That’s amazing. Good job
Oh My Gosh! I always wonder how all that dust gets in. Now I know. I’ll be looking for more places to plug up.