I’ve combined my most popular posts about full-time RV living in winter to create a comprehensive guide to prepare you and your RV for winter living.
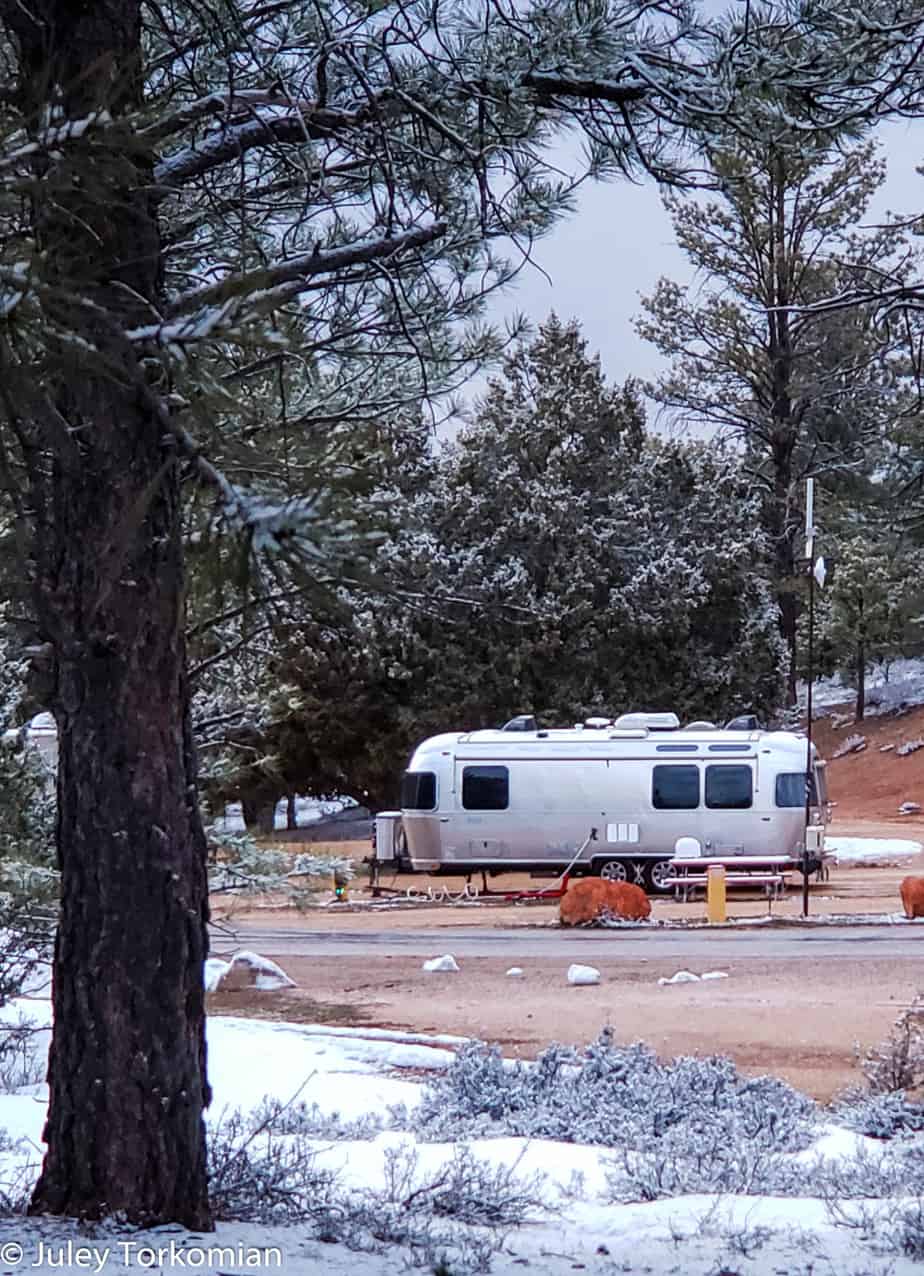
The basics are all covered in depth below but they include skirting, insulation, weather stripping, heating options, condensation prevention, water line, and holding tank safety,
Keeping The Floors Warm
I have a couple of 3×5, washable rugs to help insulate the floors a bit. However, I know there is an electric warmer you can place under a rug. I’m going to look into that. Unless you have a big fat bank account, planning to RV in winter means keeping energy consumption in mind so I’m not overloading my 30-amp system and blowing breakers and breaking the bank.
Heating Options
When the temperature outside drops below about 43-ish degrees, the heat pump cannot sufficiently warm the RV so heating has to be done by the furnace or a space heater.
Space heaters in RVs are very controversial. Many feel such a heavy and constant draw of power can overheat the wiring and cause a fire. I’m certainly no expert so my plan is to use a combination of the two but electric heat will be used sparingly and only when I’m home and awake. Also, never plug a space heater into a power strip or extension cord. This can also lead to overheating and fire.
My furnace is directly below my seat on the back end of the Airstream. I basically sit over the top of it and it gets hot in this spot while the rest of the trailer stays chilly. I’ve purchased a small fan to place under the area where I sit to pull the heat out and circulate it through the rest of the Airstream. Hopefully, that helps with my hot hiney and my cold bedroom and bathroom.
Using the furnace means using a lot of propane so I’ll probably get a larger propane tank. I have two 30 pound tanks right now but that’ll go fast.
Plumbing and Holding Tanks
The main reason it’s important to use propane heat when the temperatures get down to or below freezing, it to keep your plumbing from freezing. The warm air flowing through the heating ducts helps keep the holding tanks from freezing. My holding tanks also have warmers to keep them from freezing.
Skirt Your RV
My RV skirting for winter took just two afternoons to install on my own.
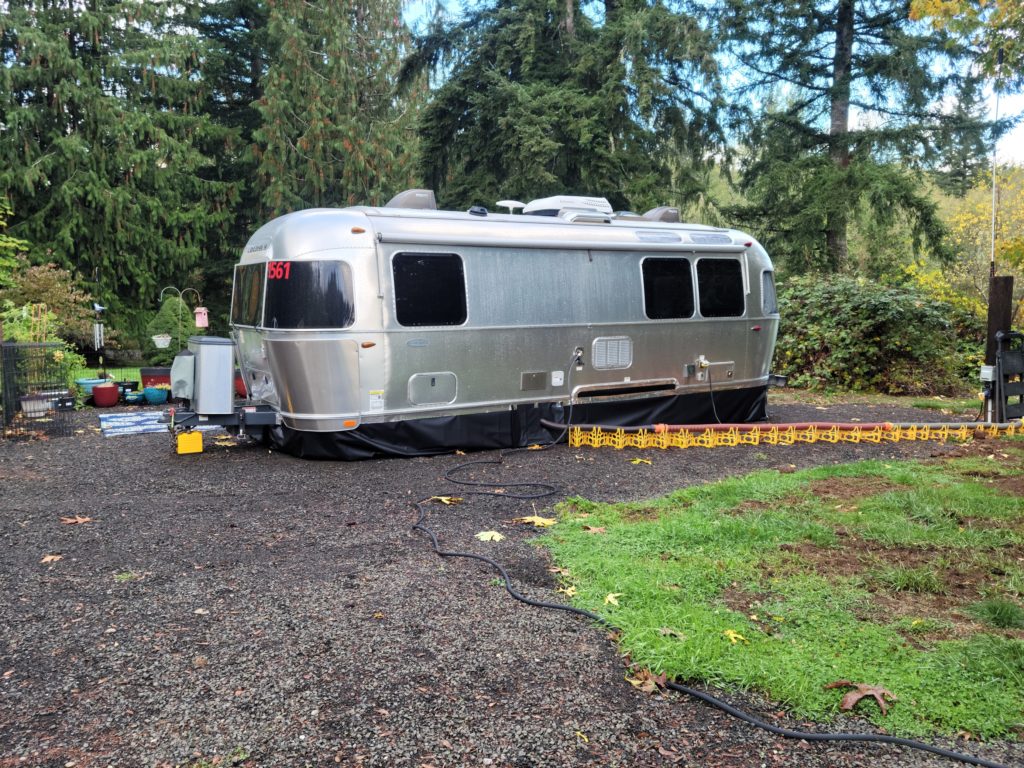
One of the things that helps the most in keeping an RV warmer in the winter is skirting. Placing a barrier around the bottom of the RV to keep warmer air trapped under the RV and colder air out makes a considerable difference. Keeping the underbelly warm will help us RV in winter in comfort. Some people even put a small space heater or heat lamp under their rig to keep the air warmer which in turn, keeps the RV warmer.
Why Skirt Your RV For Winter?
Skirting your RV for winter is a means of keeping out cold air and collecting any warmth that radiates from your RV. As temperatures drop it gets harder and harder to keep your RV warm inside. All that cold air blowing across the bottom of your RV only increases the challenge.
It’s imperative to keep your plumbing system from freezing. Having no water is a major inconvenience but the damage caused by freezing water lines and tanks can cost thousands in repairs.
RV Skirting Solutions
When I started looking at RV skirting solutions for my Airstream the main thing that stood out to me was the price. Options I explored and priced out were surprisingly expensive and ranged from about $500 to $2,000. I spent hours searching the web for an inexpensive DIY RV skirting option then I found billboard vinyl.
I choose billboard vinyl because the cost is very reasonable (super cheap), it’s flexible for Bridget’s (my Airstream) curves. I purchased my vinyl from Billboardtarps.com. I purchased a 4′ x 65′ piece of heavy black vinyl. The cost for my vinyl was $43 plus tax and shipping for a grand total of $69.
If you choose vinyl as your DIY RV skirting solution, make sure to check the shipping rates. One site wanted more for shipping than the cost of the vinyl. Billboardtarps.com was great. They shipped fast via FedEx and their shipping charge was very reasonable. You can read all the details about skirting your RV with billboard vinyl in this post; RV Skirting for Winter – How To Skirt Your RV On The Cheap.
RV Skirting for Winter – How To Skirt Your RV On The Cheap
When determining how much vinyl to order, overestimate a bit. I cut it really close and had only about a 2′ by 2′ chunk leftover.
My first step was to lay the vinyl out around the trailer.
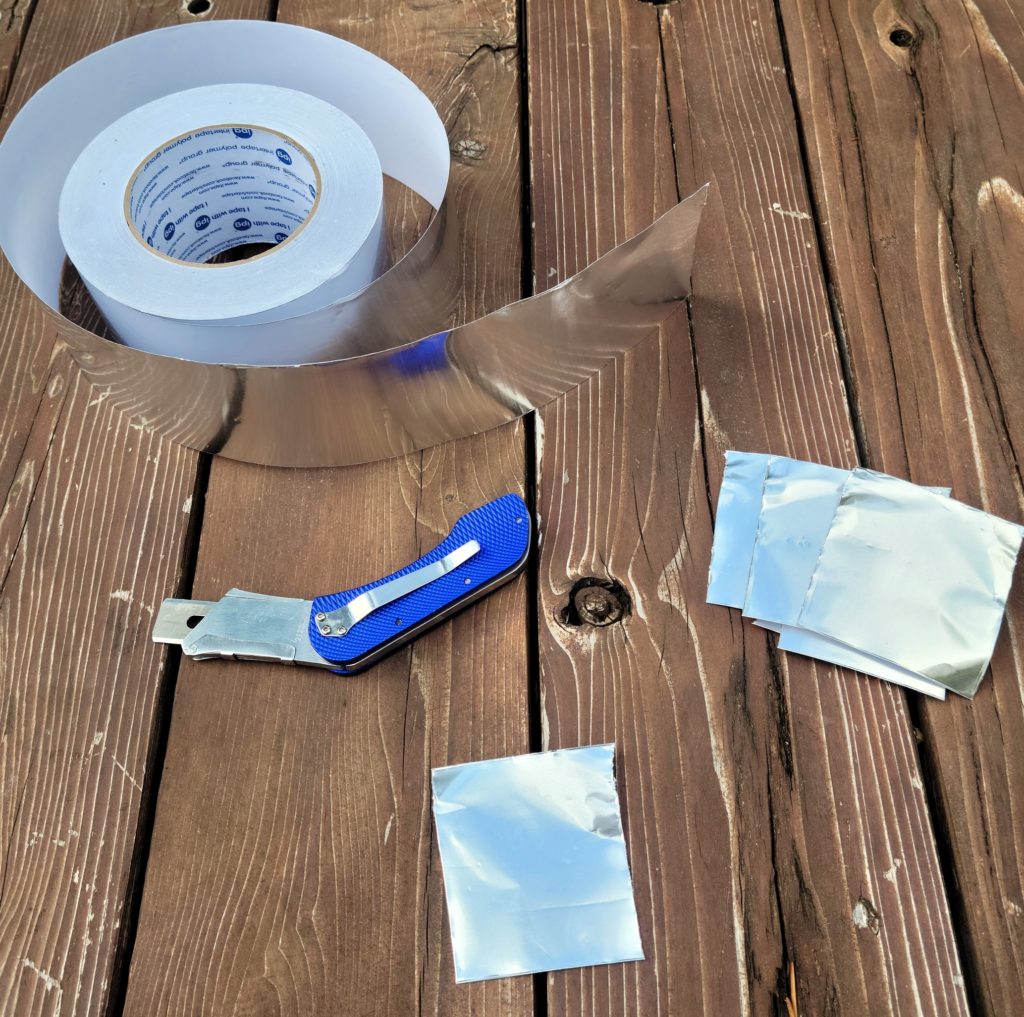
To attach the vinyl, I used a 3″ Cold Weather Aluminum Foil Tape, a utility knife, and a tape measure. Before I got started, I cut a bunch of roughly 2′ sections of foil tape.
I applied a small section of tape every three feet or so along on side of the trailer.
I’m pretty happy with the way the wheel wells turned out. The stairs and front end around the A-frame were tricky though.
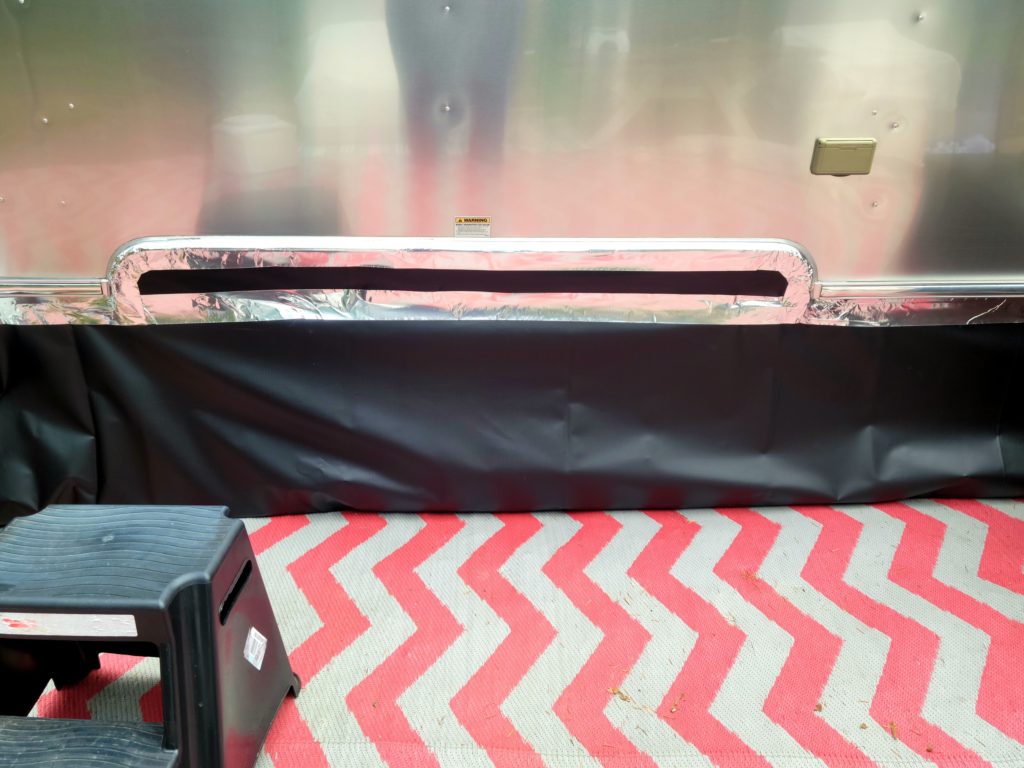
At the back end of the trailer, my concern was there is no vertical surface to tape the vinyl to and I wasn’t sure if the tape would hold applied horizontally to the underside of the bumper.
The underside of the bumper and trailer is covered with a piece of smooth sheet metal. I decided to try taping the vinyl in place as I had done with the rest of the trailer. So far the tape is holding really well. I’ve checked it several times and we have had some severe wind storms.
I made an opening for the sewer hose and added a flap secured by an outdoor self-adhesive hook and loop closure to make it easy to open and close when I need to dump my tanks.
Seal Those Places Where Cold Air Gets In
Outside Storage Bays and Under the Beds
I have twin beds in my Airstream and under each of them is a storage bay accessible from the outside. I’ve had the platform off the spare bed but never really considered just how much cold (or hot) air can enter through that space.
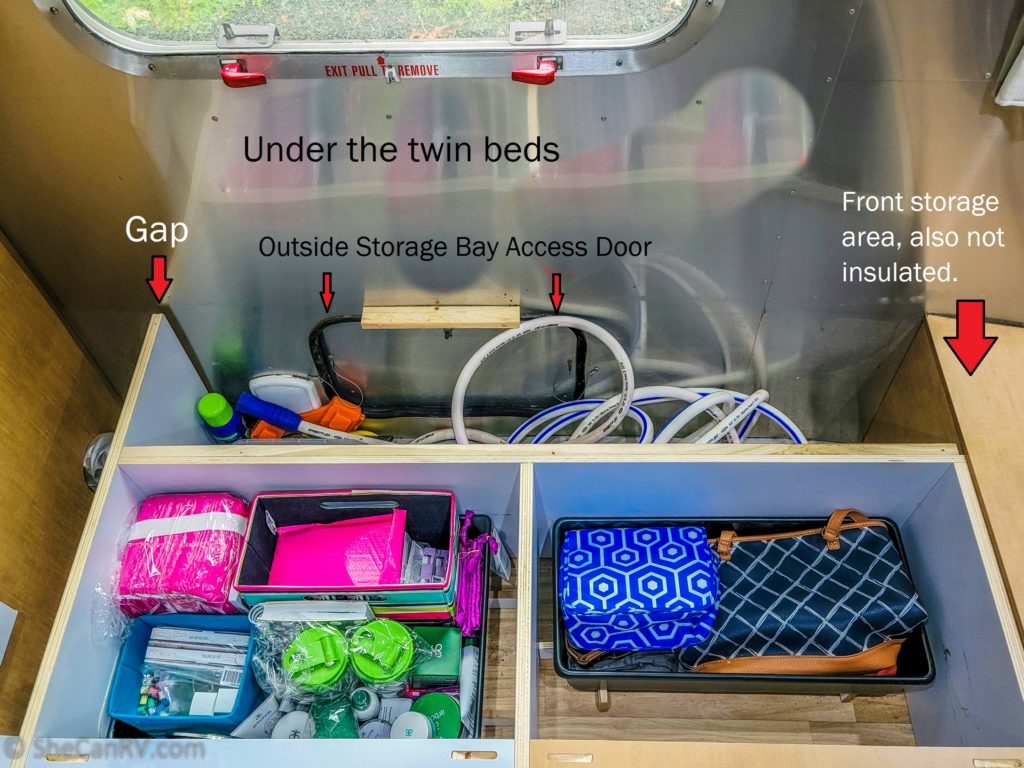
Under the bed platform is interior and exterior storage. There was no insulation and there are some large gaps between the exterior wall and the frame of the storage area. There isn’t much I can do about the air coming in through the exterior door but I insulated three walls in the exterior bay with Reflectix and filled the gaps with weather stripping. You can read how to do this in your RV here; Winter RV Living – Creative Ways To Keep Your RV Warmer.
Winter RV Living – Creative Ways To Keep Your RV Warmer
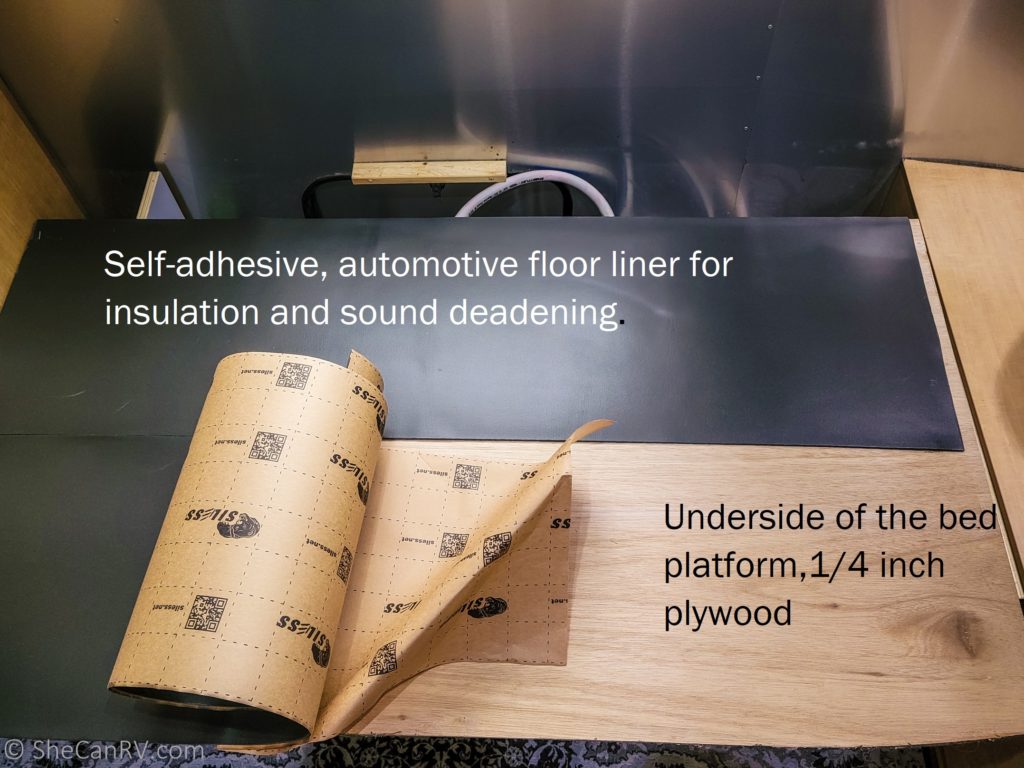
I flipped over the plywood bed platform to expose the underside and applied self-adhesive insulation/sound deadening material meant for cars. I used this stuff; Car Sound Deadening & Heat Insulation Closed Cell Foam.
This has been one of the best things I have done to keep my RV warmer this winter. It’s been immensely helpful.
I forced weatherstripping into the large gaps in the exterior storage bay. I used Sponge Neoprene Stripping With Adhesive 1 in Wide X 1/2 in Thick X 25′ Long.
I wrapped the walls in the exterior storage bay with Reflectix to insulate further. I also taped it in place using the aluminum tape I mentioned above. I used Double Bubble Reflective Foil Insulation.
Weatherstripping Around The Entry Door
I applied new weatherstripping around the entry door. It is thick, heavy-duty neoprene. It’s a bit too wide for the door frame but it hasn’t been a problem. It’s too thick for the hinge side of the door but thinner weatherstripping fills that gap well. I can no longer see daylight through the gap. I call that a win.
Cover Your Screen Door With Clear Window Insulation.
I covered the screened sections of my screen door with clear plastic. I did this thinking it would help with the drafts around the entry door but I also wanted to be able to leave the door open on nicer days without letting all the cold air in. The third reason is that my door is curved and there is no awning above it and that allows rain in when the door is open. This helps keep rain from coming in when I’m letting the dog in and out. I’ve been happy with the results.
I used a Frost King Window Insulation Kit V93H, 42-Inch by 62-Inch. This is the type you apply to the door or window frame using tape included in the key. Then you use a hairdryer to gently shrink the plastic tight so it’s quite transparent.
To see a demonstration of installation check out this video. How to install the Frost King Shrink Window Insulation Kit
You can read all the details about that project here. Cozy Full-Time RV Living in Winter – 5 More Simple Tips.
Cozy Full-Time RV Living in Winter – 5 More Simple Tips
Fan Vent Insulation Pillows
A lot of warm or cool air can be lost through those vents we all have in our ceilings. They make a product specifically for that problem. Safoner RV Vent Insulator And Skylight Cover with Reflective Surface. They make these without the reflective surface but when It’s really hot outside, I plan to use them as heat-reflecting insulation.
I’ve had these in place for about a month and I can tell the difference. Some of these have removable covers so read the description and get the style you think will work best for your situation.
More Bubble Insulation Applications
I find places where there is an outside opening like around the outdoor shower, freshwater fill door, storage bays, etc. it’s like a draft superhighway. To give a little added protection, I cut pieces of bubble insulation to fit snugly in those places.
I also lined the front storage bay, which is under the head of my bed, with bubble insulation. The vent for my inverter which is not in use needed to be covered also.
Water Hose Insulation
My brother installed a new water line and spigot closer to the trailer.
I just can’t bring myself to buy one of those expensive heated hoses. I have wrapped my water hose with foam pipe insulation and run an Automatic Electric Pipe Heating Cable, down the length of the water hose, and zip-tied it in place. I’ve also run the heating cable up the water pipe and added an insulated cover to the top to keep that part from freezing. The last time I was home during the winter we used this setup and it worked flawlessly.

Moisture Control
Controlling RV condensation is more important than you might think, and here’s why. Excess moisture builds up on hard surfaces and accumulates on soft surfaces. If this moisture is left unchecked, it will cause mold and mildew. That’s not good for you or your RV.
I have a dehumidifier I use when I’m in damp or humid areas. It also puts out a fair amount of heat when it’s running so that’ll help keep me warm.
Get a Hygrometer
It’s a good idea to know the actual moisture level in your RV. This super inexpensive device will tell you.
ThermoPro TP50 Digital Hygrometer Indoor Thermometer Room Thermometer and Humidity Gauge
The humidity level you’re looking for is below 60%. Ideally between 30% and 50%. I have mine set on 50%. I find that is comfortable without being too drying for my skin and sinus passages while keeping condensation at bay.
Run A Dehumidifier
Dehumidifiers actually pull moisture from the air. They come in many sizes based on the number of square feet they are able to dehumidify.
Several years ago I purchased a good quality dehumidifier to help with RV condensation. Much of the year it stays packed away under the bed but when I have to get it out, it’s a game-changer. My Airstream is only 25′ and many would consider my dehumidifier overkill. I tried one of those little blue and white ones you see RVers talking about but it just wasn’t up to the task.
Ivation 13-Pint Small-Area Desiccant Dehumidifier
I consider it mandatory equipment. Mine has a setting for the percentage of humidity I want to target and it shuts off when it reaches the target.
Avoid Propane Heat When Possible
Burning propane creates water vapor so your propane furnace adds moisture to the air. If at all possible, use your heat pump or electric heat. These alternatives to your propane furnace actually dry the air.
Circulate the Air
Circulating the air in your RV will help with moisture control by drawing out stagnant cool air and mixing it with the dryer air and moving it around. This helps it shed some of the moisture and will keep those nooks and crannies dryer.
Many people will advise you to keep a vent or window cracked open. I disagree. If you’re in a very wet climate, allowing in more damp air isn’t helping. I like to use a fan to move the air. I keep a small fan, on the lowest setting under the dinette. It really helps keep air circulating and those hard-to-reach spaces are dryer. This is my fan and I love it.
Cooking Causes Consensation
The fastest way to fill your RV with steamy air is cooking. I have learned using my Instant Pot is one of the least moisture-producing options. The steam is contained until you’re finished cooking. When you release the steam, place the Instant Pot directly under the running stove vent and release the steam. That way, it all goes outside.
Instant Pot Duo 7-in-1 Electric Pressure Cooker
Using your propane oven will create some moisture but not nearly as much as cooking on the stovetop. If you have a convection oven, that’s the best way to cook to reduce moisture.
Moisture Absorbers
Check your storage areas for moisture and that musty smell (you know the smell) frequently. If you have a spot that tends to get musty and you have ruled out a leak, try placing a moisture absorber like Damp Rid there. it will collect the moisture and keep your belongings dry and fresh smelling.
DampRid Fresh Scent Refillable Moisture Absorber – 10.5oz cups
DampRid Hanging Bag, Moisture Absorber, Pack of 3
Use The Vent/Fan While Showering
The only time I actually use the vents when it’s really damp outside is when I’m showering. Pulling out that warm, moist air is important when you’re fighting RV condensation. Be sure to close it again after you finish showering.

Insulate Your Windows
Many RVs have single-pane windows. A piece of glass with warm air on one side and cold air on the other will sweat. The good news is, it’s not hard or expensive to remedy this.
You may choose to insulate with clear plastic or reflectix if you don’t mind blocking the view. Leave a space between the insulation and the window where warmer air can collect for best results.
My bedroom windows are covered with bubble insulation to keep the cold air out. I don’t mind the darkness in there.
There you have it! My entire repertoire of cold weather RVing tips. Be sure to check out the linked posts for full details and how-to information.
If you like this post, please pin it.

This is a great resource. I am implementing several of these suggestions. I have a 28’ RBT with 9 glass windows (no screen). These glass windows produce an incredible amount of condensation. Have you tried to put the clear plastic on the windows with the slide curtains? The two windows above the sink would require tape applied to aluminum finish – not sure I want to do that – but hate to put the reflectix there. Maybe use reflectix at night when the furnace is running the most?
Hi Penny,
I did try putting plastic on the inside of the windows and found that moisture collected between the plastic and the window. The best solution I found to keep the windows dry was to place small fans around the Airstream pointing them to the windows. It’s an ongoing battle.
The other thing to watch is your storage compartments. Just today I disassembled the platform under my bed and found mold and mildew. I suspect it was from last winter and I had never found it. The musty smell, when I opened those storage compartments, was unmistakable.
Perhaps you could keep them open part of the time to keep the air flowing.
Best of luck to you. It’s a challenge. I’m in Texas this winter. There is moisture but nothing like days of neverending rain.
Juley