RV water inlets get a lot of use and will likely fail over time. Good news! It’s an easy and inexpensive do-it-yourself repair project. I’ll show you how.
RVs deliver water using one of two methods.
- Freshwater tank and water pump. Most modern RVs have a freshwater holding tank and a water pump to deliver that water to the faucets. This system is most commonly used when there are no hookups.
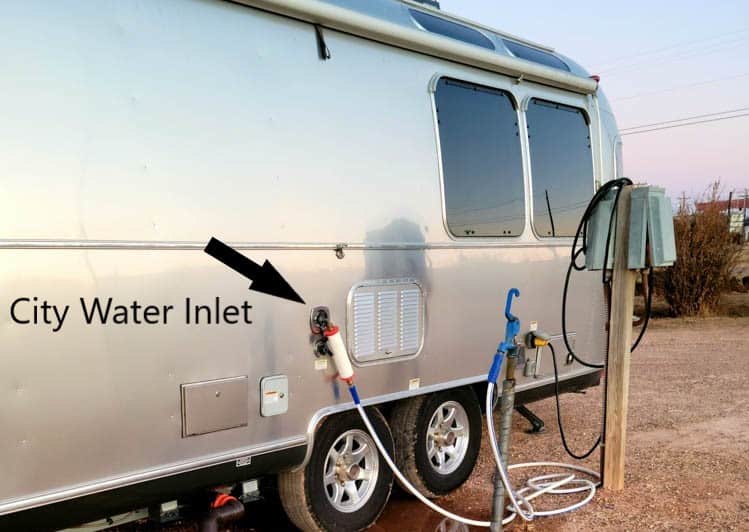
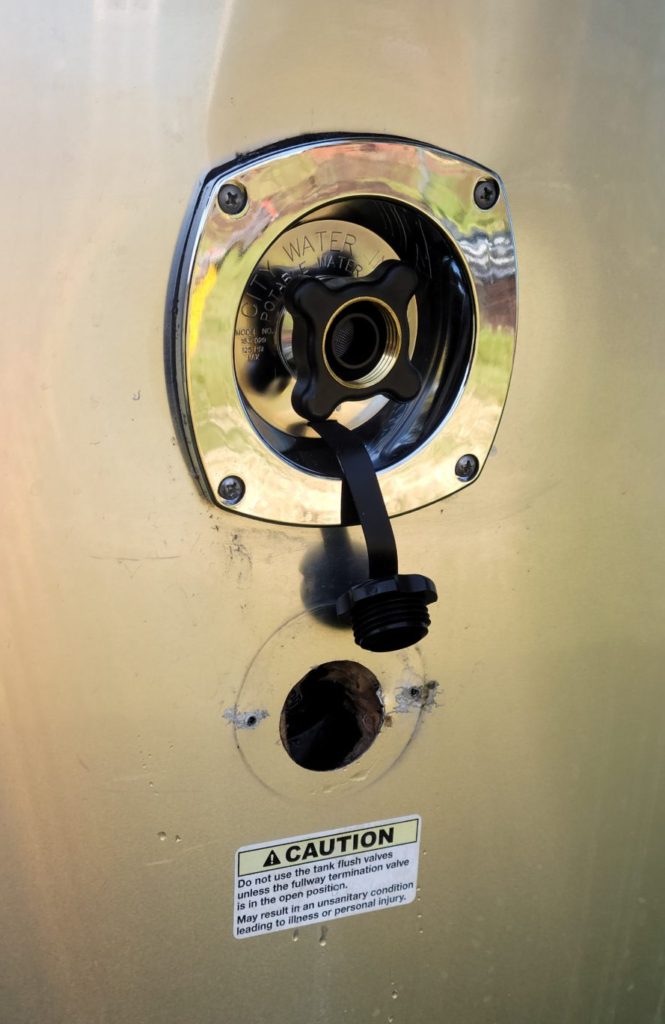
- City water connection. The RV city water connection is where you attach one end of your drinking water safe hose that brings fresh water from an active water spigot to your RV. When you’re hooked to city water your water runs using pressure rather than your water pump
Diagnosing an RV Water Inlet Leak.
I recently noticed water dripping under my Airstream near the wheel well on the driver’s side. The water was coming from directly under the RV city water connection and running down through the wheel well.
Airstreams have a condensation dripline that runs from the air conditioner, down into the wheel well. Depending on weather conditions, it may drip a little or a lot. It’s a good idea to get down where you can view the area well so you know where the water is coming from.
Why Did My Water Inlet Fail?
There are a number of reasons you may need to replace your RV water inlet, including failure of the valve itself, worn-out fittings at the hose connection preventing you from getting a water-tight connection, damage from freezing temperatures, or even from high water pressure.
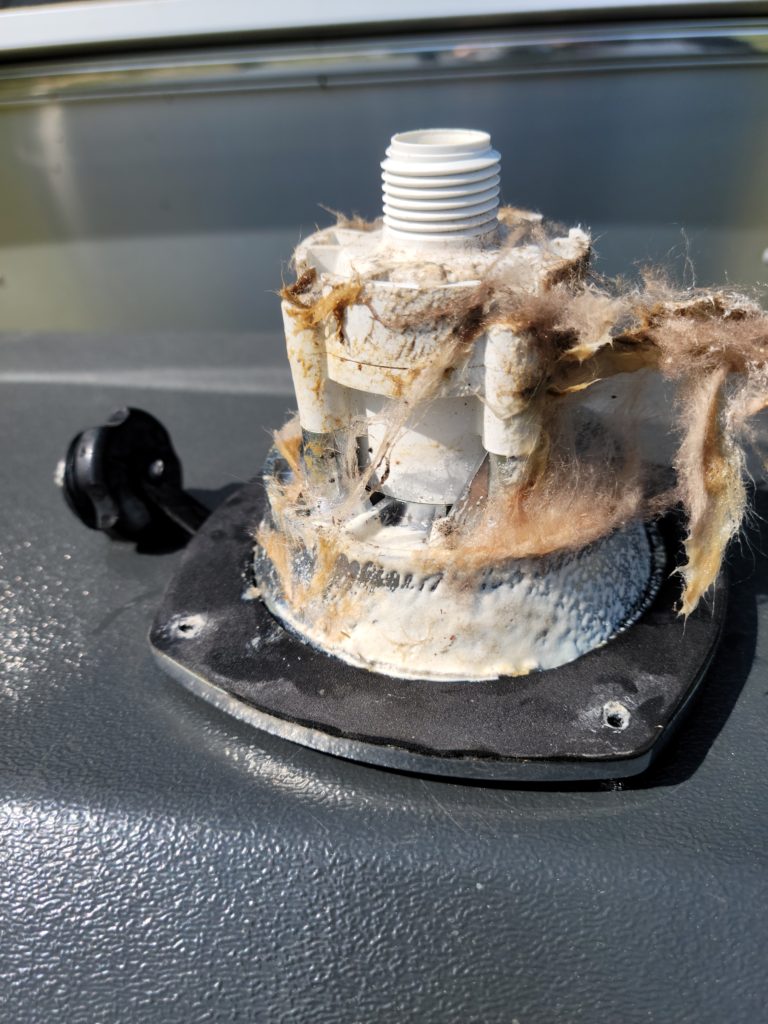
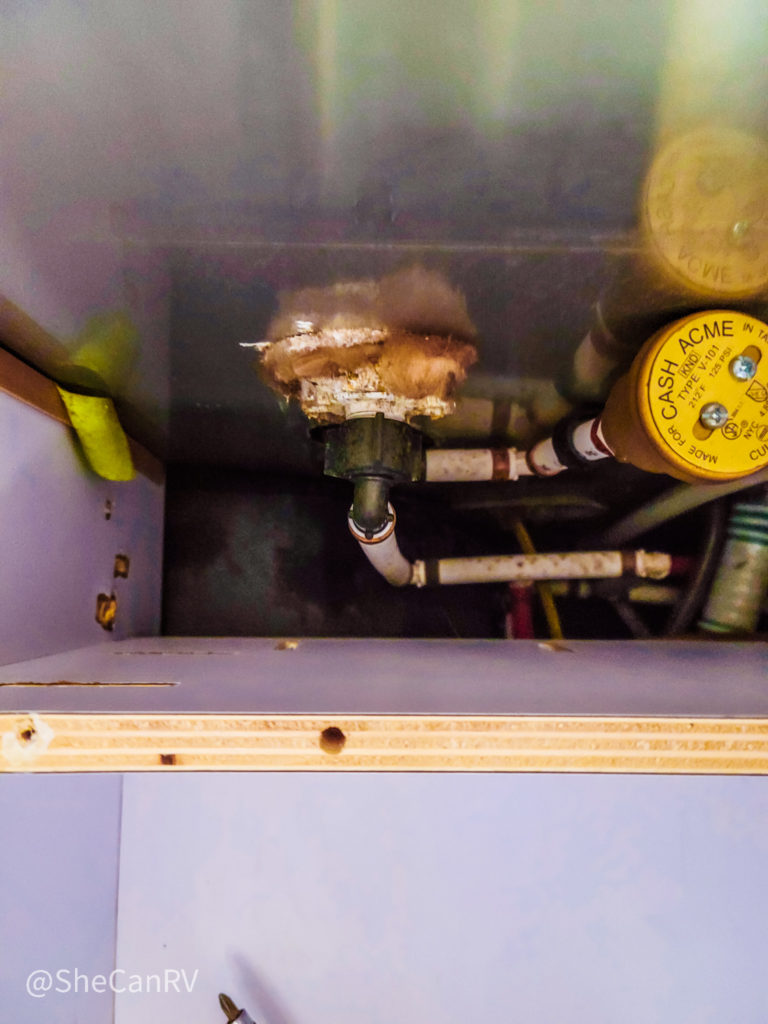
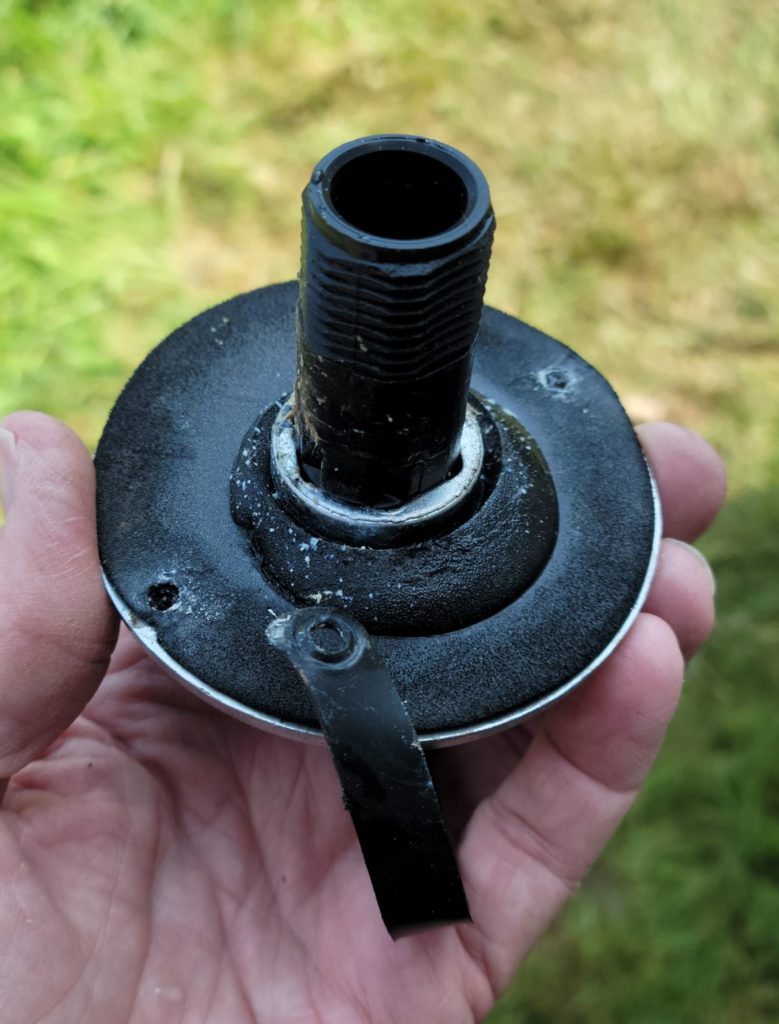
You can see my old inlet in the picture below. Due to the location of the leak, I believe it failed at the pressure regulator which is built into the inlet. Unfortunately, it leaked between my interior and exterior walls and soaked the insulation.
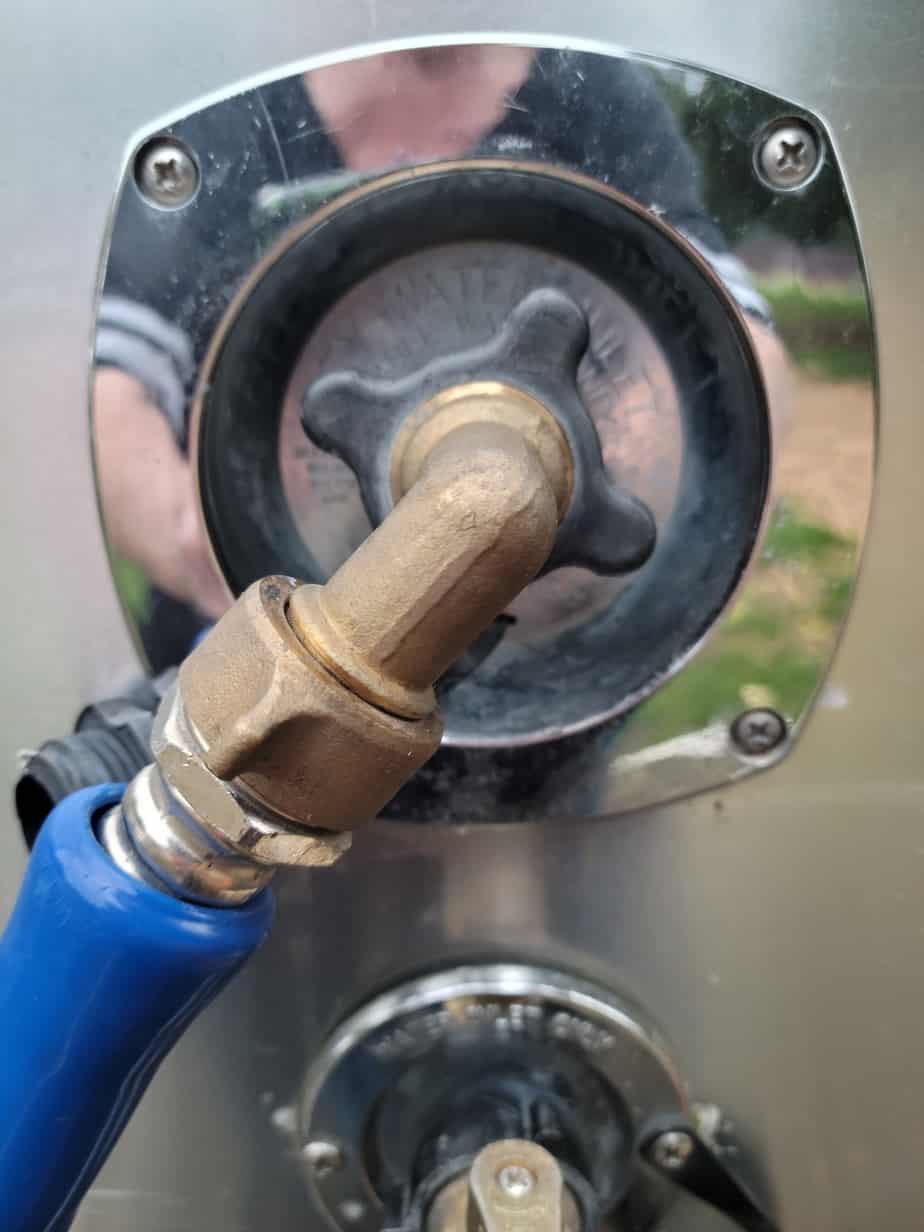
Your freshwater inlet is also under extra stress with the weight of the hose hanging from it when you’re hooked up to a water source. To help reduce this stress I use a brass elbow filling between the hose and the RV water inlet. This can help extend the life of your inlet.
You may notice water dripping (or running) from the inlet on the outside of your RV, from under the RV, or even inside, depending on where the failure has occurred.
My leak was only present when I was connected to city water. When there was no hose attached to my RV water inlet, there was no leak. That indicated a new RV water inlet was in order.
Choosing the Right Replacement Water Inlet
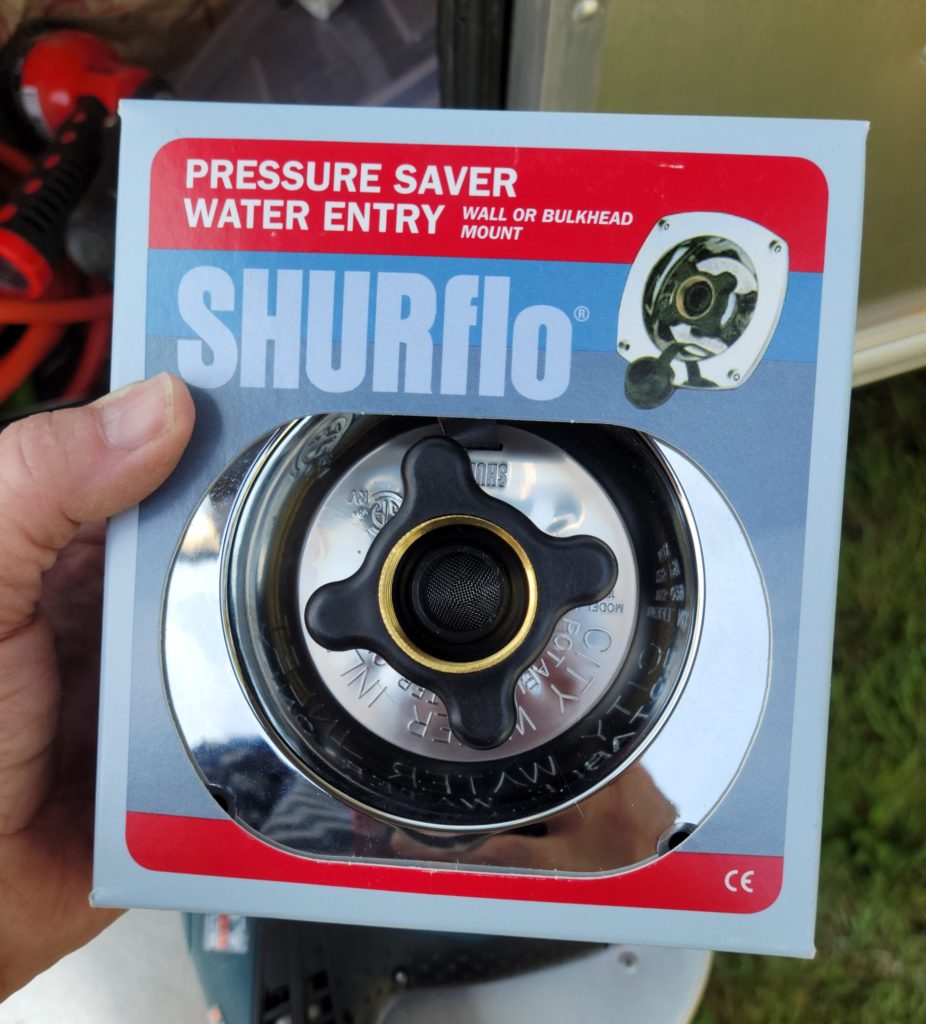
For late model Airstreams, SHURFLO (183-029-14 Chrome Wall Mount Filler/Regulator is most likely the part you’ll need. You can and should double-check by contacting an RV dealer/repair shop to verify the part number.
Manufacturer websites often provide a search function so you can locate part numbers for your specific RV.
After verifying my part number, I ordered my replacement from Amazon. If you need the same one, please follow the link above to order. You may have success finding your fitting at an RV parts store or dealership. Beware, prices are often marked up excessively, so shop around.
Many of these fittings come in black, white, and chrome finishes so they blend in with the color of your RV. Since Airstreams are aluminum the chrome finish is perfect. Unfortunately, this inlet is plastic with a chrome coating as was the original.
Removing the Old Inlet
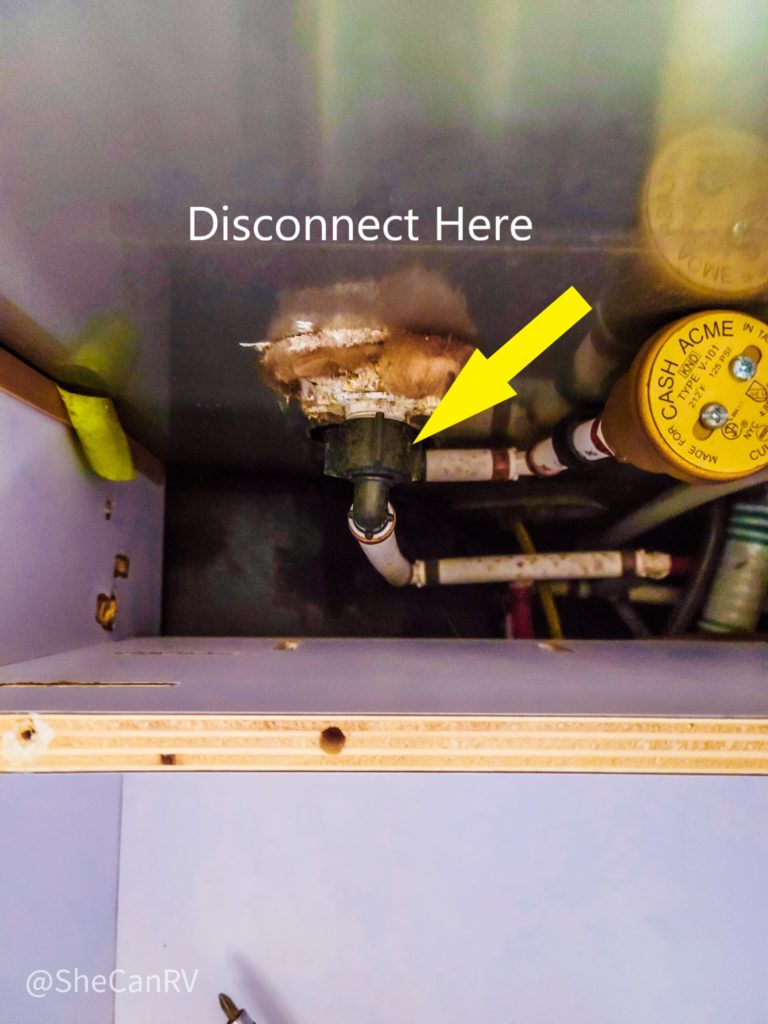
This was such an easy repair. Access to my inlet is behind my closet. There’s an access panel you’ll need to remove. The hardest part of the repair was reaching my t-rex arms into the back of the closet to unscrew the fitting.
I had to empty my closet and remove the access panel which was secured with three screws.
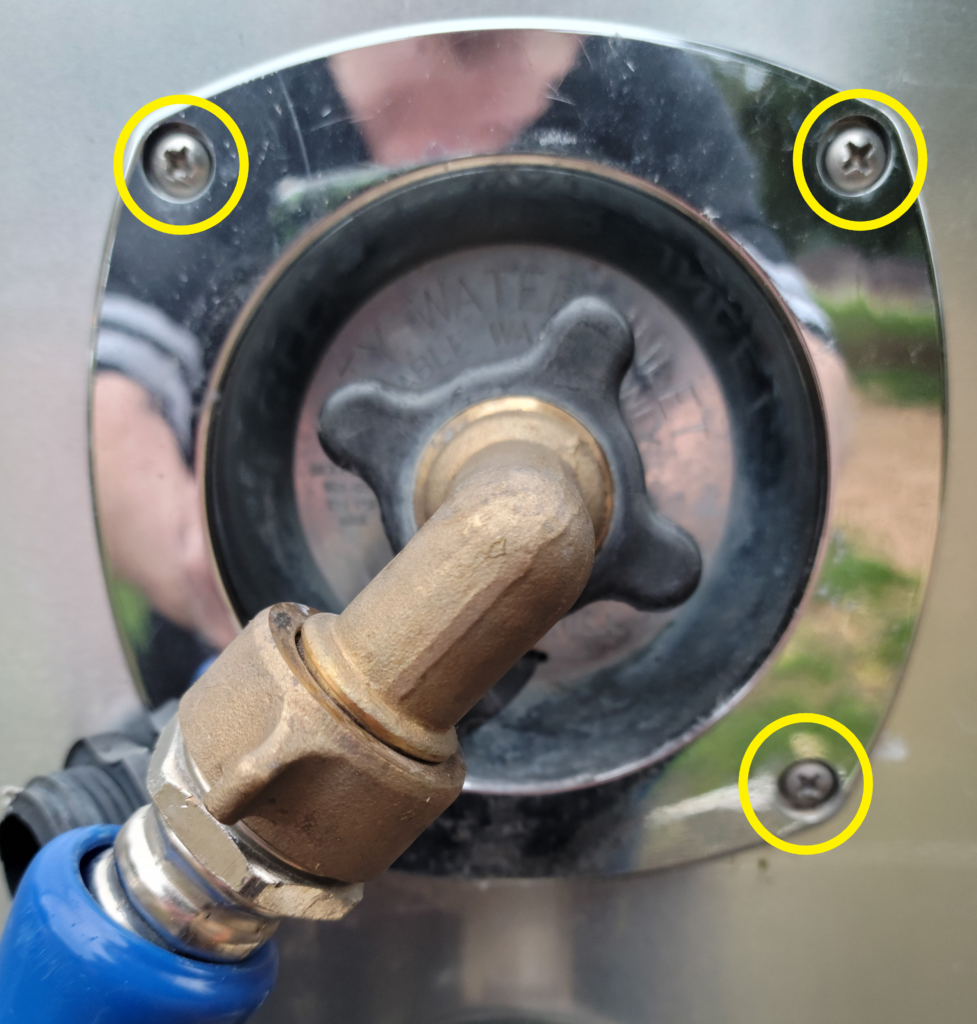
On the exterior of the RV, remove the four screws holding the RV water inlet in place as shown below.
Now you’ll need to detach the inlet by unscrewing the fitting inside the RV. It’s that simple.
You can go outside and remove the old inlet now. Make sure you remove the gasket from the old inlet unless you purchased a new one. They generally do not come with a replacement gasket. Mine was glued to the inlet so I had to remove it very carefully without destroying it.
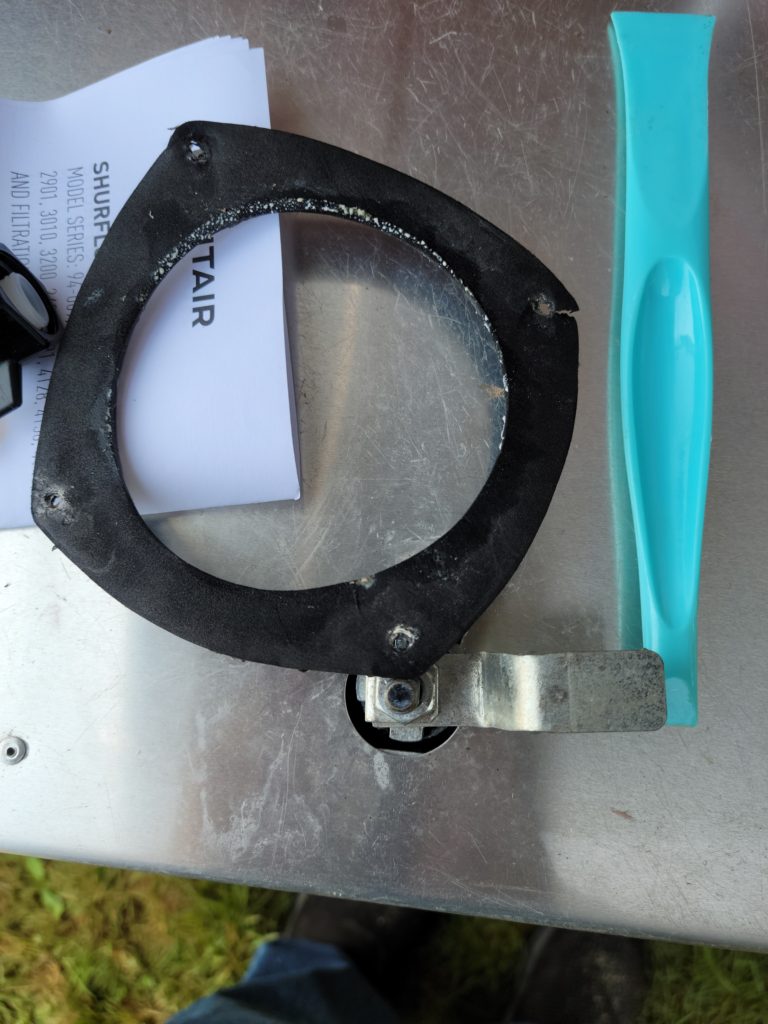
Place the salvaged gasket on the new inlet and wrap the threads with two layers of Teflon tape to prevent leaks. Reinstall the inlet by replacing the screws being careful not to over-tighten them to avoid stripping the aluminum skin.
Now you can go back inside and reattach the fitting to the back of the inlet. Hand tighten it snugly but not too tight.
It’s time to test your work by hooking the water hose up and turning it on. If the installation was done correctly, there will be no leaks. If the new fitting leaks, tighten a bit more or unscrew it and add more Teflon tape.
Once you’re confident the connections are not leaking, you can close up the access panel and you’re done!
Replacing the Sewer Flush Inlet
I decided to go ahead and replace my sewer flush connection at the same time because it’s in the same location and the part is quite inexpensive. The process is the same as above. Don’t forget to salvage the gasket and reuse it with the new fitting.
Now both connections have been replaced and should be good for years to come. Swapping out both connections took less than 30-minutes.
These are just two simple maintenance or repair items you can do yourself. Give it a try. Once you’ve had success with some of these tasks, you’ll be willing to try some more complex repairs like replacing your charge controller. You can read about that upgrade here; Is Your RV Charge Controller Damaging Your Batteries?
My leak is coming from the inside of my inlet where the right pressure hose attaches. I lowered the leak to a slow drip after swapping the swivel adapter to the pressure hose with sharkbite 1/2 ” swivels and new clamps. I still have a slow drip fdom the plastic plastic one way valve that goes to my B&B inlet. I ordered a brass one. Do you think something else is causing this leak? I am full-time on a city water connection.